
The scar is the part of mole removal patients actually live with. The procedure takes minutes; the wound heals in days; the scar takes a year. Most patients spend that year half-remembering vague aftercare advice and arriving at the final result with a scar that's a little redder, a little wider, or a little more visible than it could have been.
It does not need to be that way. The biology of scar formation is well understood, and the small set of interventions that genuinely affect the outcome is also well understood. The two that matter most, sun protection and silicone, are simple, cheap and within every patient's control. Most of the rest is patience.
This guide walks through the year in six stages, day 0 to month 12 and beyond. At each stage you'll know what your skin is doing biologically, what to do for it, and what to avoid. Written and medically reviewed by a GMC-registered consultant plastic surgeon who closes hundreds of mole excisions a year and follows them through to the final scar.
Why scar care actually matters
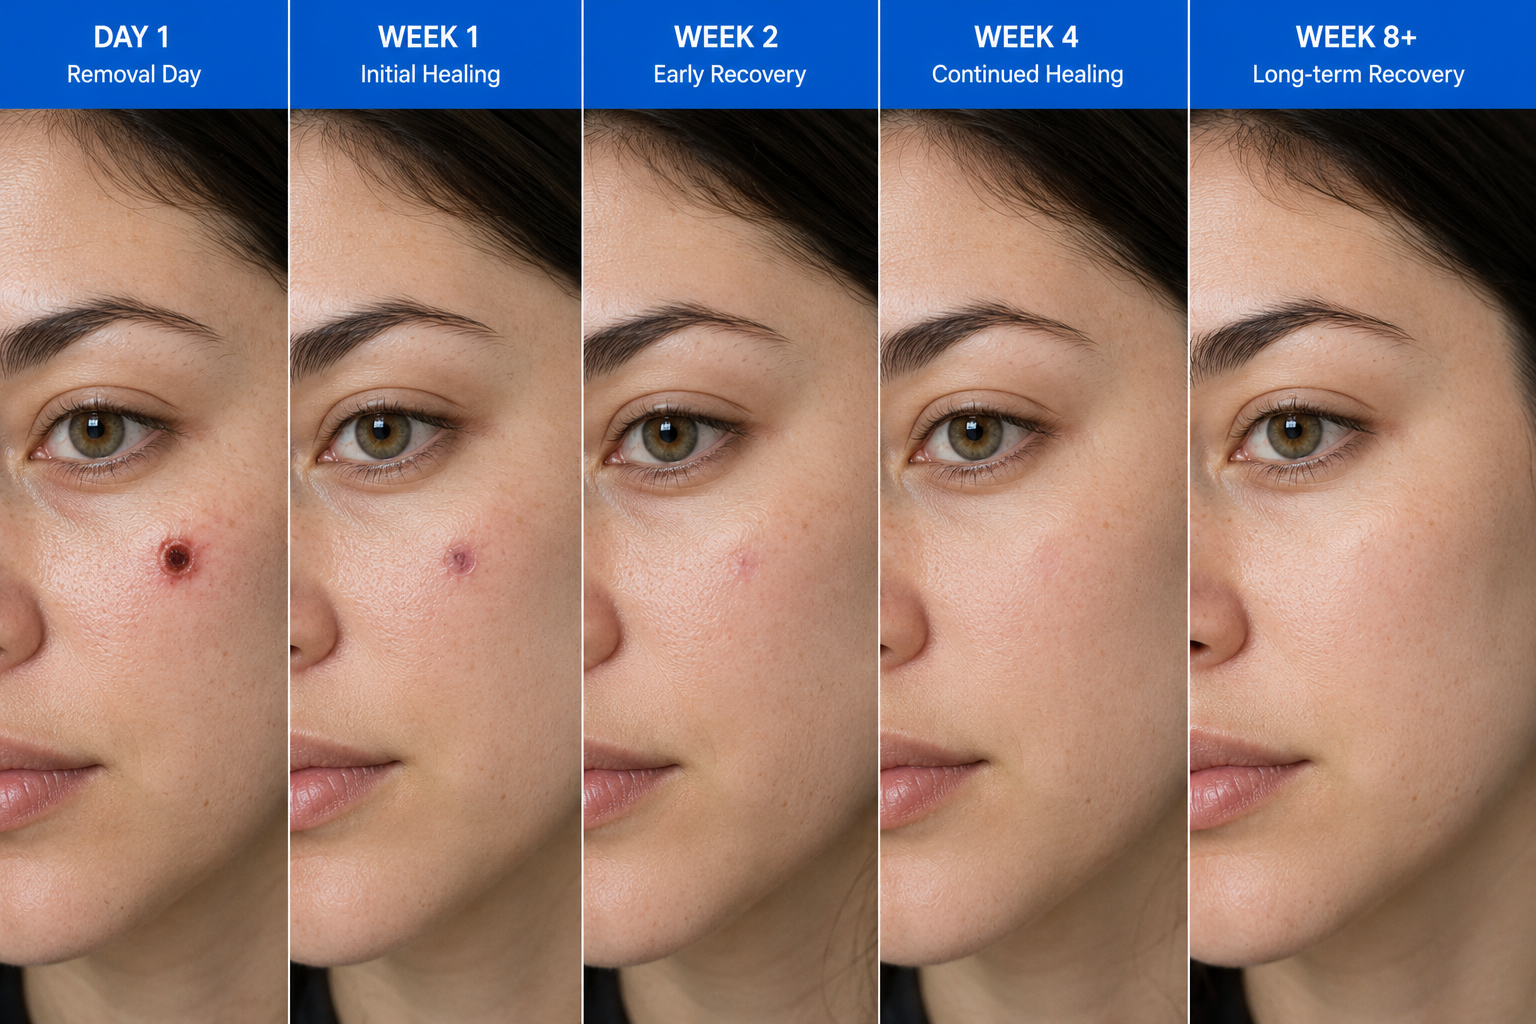
The skin you see at six weeks post-excision is not the scar you'll have at twelve months. Scars mature continuously across the first year, sometimes longer, passing through a predictable sequence: a fresh red line, a raised pink ridge, a flat purplish line, and finally a pale flat scar that is often barely visible from a normal conversational distance.
The variable in that journey is what you do during it. Specifically, three things have a measurable effect on the final cosmetic result, and the rest is essentially noise. Sun protection, silicone, and tension management. Each is supported by a body of evidence going back decades.[1] Each is within your control. Each is undervalued by patients who skip a step and then notice their scar more than they should.
The instructions below are the same ones a consultant plastic surgeon would give a family member. Nothing exotic, nothing expensive, nothing requiring specialist products. Just a clear sequence of what to do at each stage, and why.
Stage 1, Day 0 to 2: wound closure
The first 48 hours after a full-thickness excision or shave are about clean wound closure. Bleeding stops within minutes, fibrin seals the wound surface, and an inflammatory cascade begins that will dominate the first month of healing. Your job during this stage is essentially to leave the wound alone.
Keep the dressing dry and intact. Avoid touching, picking or stretching the area. If you've had stitches, expect the local anaesthetic to wear off after about 90 minutes, and most patients describe a mild dull ache rather than sharp pain. Paracetamol is sufficient for the great majority of mole excisions; ibuprofen is fine after 24 hours but unnecessary for most.
Avoid alcohol on the day of the procedure, it widens superficial blood vessels and can prompt fresh oozing under the dressing. Avoid heavy exercise that would stretch the wound. Sleep on the opposite side if the wound is on your shoulder, back or face. If the dressing becomes wet or starts to lift, change it for a fresh one and keep it dry from then on.
Stage 2, Day 3 to 7: re-epithelialisation
By day three, keratinocytes (the cells that form the visible surface of the skin) have begun migrating across the wound from the edges. By day five to seven, in most uncomplicated wounds, the surface is sealed. This is when you can begin to wash the area gently.
Practical instructions for the week one. Once-daily wash with lukewarm water and a non-fragranced cleanser, no scrubbing. Pat dry with a clean towel, do not rub. Replace the dressing if it gets wet, but you don't need to keep it dressed continuously after day three if the wound is not on a high-friction area. Keep antibacterial ointments out of it unless your consultant has specifically recommended one, they're rarely needed and can sometimes cause contact dermatitis.
Watch for redness extending beyond the wound margin, increasing pain rather than decreasing, fever, or any discharge that isn't a small amount of clear or pale yellow fluid. Infection in clean mole excisions is uncommon (under 2% in most series[2]), but if it happens, early antibiotics resolve it quickly. Email or call the clinic, do not wait days hoping it will settle.
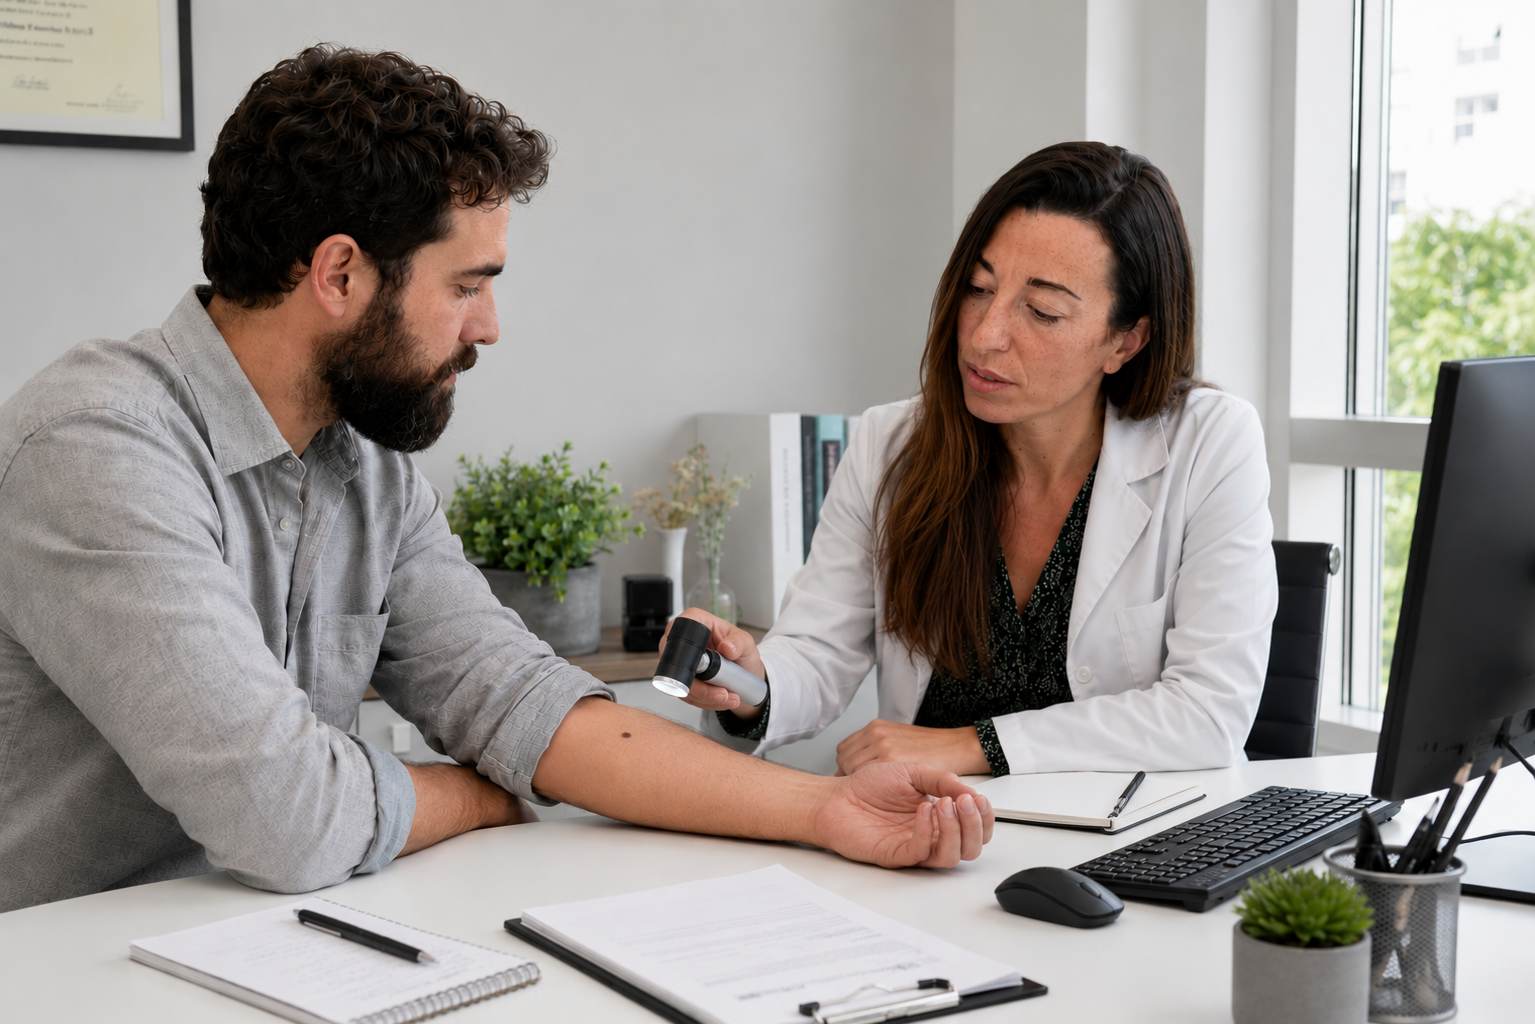
Stage 3, Week 1 to 2: stitches out, scar starts
Sutures are removed at 7 to 14 days depending on the location: 5 to 7 days on the face, 10 to 14 days on the body, longer on the back where wounds carry the most tension. The removal itself is painless, a few seconds of mild tugging. From this point forward, the visible mark is the scar, and the year-long maturation begins.
Two interventions start now. First, silicone: either a silicone gel applied twice daily or a thin silicone sheet worn over the scar for at least 12 hours a day. Silicone is the only over-the-counter scar treatment with a strong evidence base, supported by multiple randomised trials and a Cochrane review.[3] Both formats work; choose whichever fits your routine. Continue for at least three months, ideally six.
Second, sun protection: SPF 50+ broad-spectrum cream applied to the scar daily, indoors and out, for the entire first year. UV exposure to immature scar tissue causes hyperpigmentation that often becomes permanent. This single intervention is the largest determinant of how visible your scar is at 12 months. Buy a small dedicated tube, keep it next to your toothbrush, apply morning and after any wash.
Stage 4, Month 1 to 3: inflammatory peak
This is the stage when many patients lose their nerve. Around weeks four to twelve, the scar reaches its visual peak: it is at its reddest, may feel slightly raised, can itch, and looks more obvious than it did at week two. This is normal. It is not a sign that something has gone wrong. It is the body laying down collagen chaotically before later remodelling cleans it up.
Stay the course. Continue silicone twice daily, continue daily SPF 50+, and at week four you can add gentle scar massage: clean fingertips, firm circular pressure for two to three minutes, twice a day. The goal is not to break anything down; it is to encourage the collagen fibres to align in the direction of skin tension rather than randomly. Massage is supported by evidence as a small but real contributor to scar quality at 12 months.[4]
Avoid these for the full first year: tanning beds, deliberate sun exposure of the scar without SPF, vigorous stretching of the wound area in early gym sessions (most patients can return to normal exercise at three to four weeks), and any 'scar revision creams' marketed with hyaluronic acid, vitamin E or onion extract, the evidence for which is weak to absent. Stick to silicone and SPF; the basics work.
Stage 5, Month 3 to 6: remodelling
The scar's biology shifts from inflammatory to remodelling. Disorganised type III collagen is gradually replaced by aligned type I collagen, the same protein found in unscarred dermis. Visually the scar starts to flatten, the redness softens to pink, and the texture becomes more like the surrounding skin.
Your routine relaxes slightly. Silicone can be reduced to once daily by month three; you can stop entirely at month six if the scar is flat, pale and asymptomatic. Daily SPF stays. Massage continues if the scar still feels firm or raised. Most patients are visibly happier with the scar at four months than they were at six weeks, and the trajectory continues from here.
Two adjuncts are sometimes useful at this stage if a scar is misbehaving (raised, red, itchy beyond month three). Intralesional steroid injections can flatten hypertrophic scars, and pulsed-dye laser can fade persistent redness. Both are options your consultant will offer if needed, they are not first-line and most patients never need either. They exist as a backstop, not a routine step.
Stage 6, Month 6 to 12+: final maturation
The final six months are about patience. Scars continue to mature, fade and flatten, but the rate of change slows considerably. Most of what your scar will look like at 18 months is already visible by month nine.
Keep up daily SPF for the rest of the year, this is non-negotiable. The risk of post-inflammatory hyperpigmentation in immature scar tissue persists for the full first year, particularly in skin types III to VI. Beyond 12 months, normal sunscreen use during sun exposure is fine; you no longer need a dedicated daily application on the scar.
If you are still unhappy with how the scar looks at 12 months, that is the right time to discuss revision. Revision options range from minor (steroid injection for a residual lump, dermabrasion or laser for surface texture) through to formal surgical revision. Most patients we see at 12 months are happier than they expected and decline revision; those who want it have a clear conversation with the consultant about realistic expectations.
What actually affects the final result
Five factors do most of the work in determining how a scar settles. Knowing them lets you focus your effort on what matters and stop worrying about what doesn't.
Sun protection. SPF 50+ daily for 12 months. The single largest cosmetic determinant, particularly for patients with skin types II to V. Silicone. Twice daily for three to six months. Modest but consistent benefit shown across multiple trials. Tension on the wound. Wounds under high tension scar wider; that's why your consultant places incisions along skin tension lines, takes care with closure, and asks you to avoid stretching the area for the first month. Genetics. Some patients form keloid or hypertrophic scars more readily; if you have a known tendency, tell your consultant before the procedure. Surgical technique. Performed by a consultant trained in skin surgery, with appropriate suture choice and closure technique, the procedure itself contributes more than any aftercare can.
What does not meaningfully affect the outcome: scar creams marketed with vitamin E, aloe vera, onion extract or hyaluronic acid; expensive 'medical-grade' moisturisers; supplements; bandage colour. The evidence is poor to absent for all of these. Save the money and put it into a tube of SPF 50+ and a basic silicone gel.
Warning signs that justify an interim consultation
Most scars heal uneventfully. A small minority do not, and recognising the signs early lets us intervene before a problem becomes harder to fix. Email or call the clinic if any of the following apply.
In the first two weeks: spreading redness beyond the wound, increasing rather than decreasing pain, fever, pus or significant ooze, the wound opening up after sutures are removed. These are the markers of infection or wound dehiscence, both of which are easy to manage early and harder later.
In the first three months: a scar that is rapidly growing in width or height, a raised firm scar that becomes itchy or painful, a scar that develops a darker brown patch (post-inflammatory hyperpigmentation often starts here), or any new symptom in the original mole site. These can be early hypertrophic or keloid changes and respond well to early steroid injection.
Beyond six months: persistent redness or rope-like firmness, a scar that has widened beyond the original incision, or significant asymmetry in tension lines. These are the situations where a scar review at 6 to 12 months gives the best window for revision options. Most patients in this group benefit from a 30-minute discussion of what's reasonable to expect and what (if anything) is worth doing.
Common questions
Frequently asked
References
Sources cited
- Bayat A, McGrouther DA, Ferguson MW. Skin scarring. BMJ. 2003;326(7380):88-92. View source
- Heal CF, Buettner PG, Drobetz H. Risk factors for surgical site infection after dermatological surgery. Int J Dermatol. 2012;51(7):796-803. View source
- O'Brien L, Jones DJ. Silicone gel sheeting for preventing and treating hypertrophic and keloid scars. Cochrane Database Syst Rev. 2013;(9):CD003826. View source
- Shin TM, Bordeaux JS. The role of massage in scar management: a literature review. Dermatol Surg. 2012;38(3):414-423. View source
- Mustoe TA, Cooter RD, Gold MH, et al. International clinical recommendations on scar management. Plast Reconstr Surg. 2002;110(2):560-571. View source